
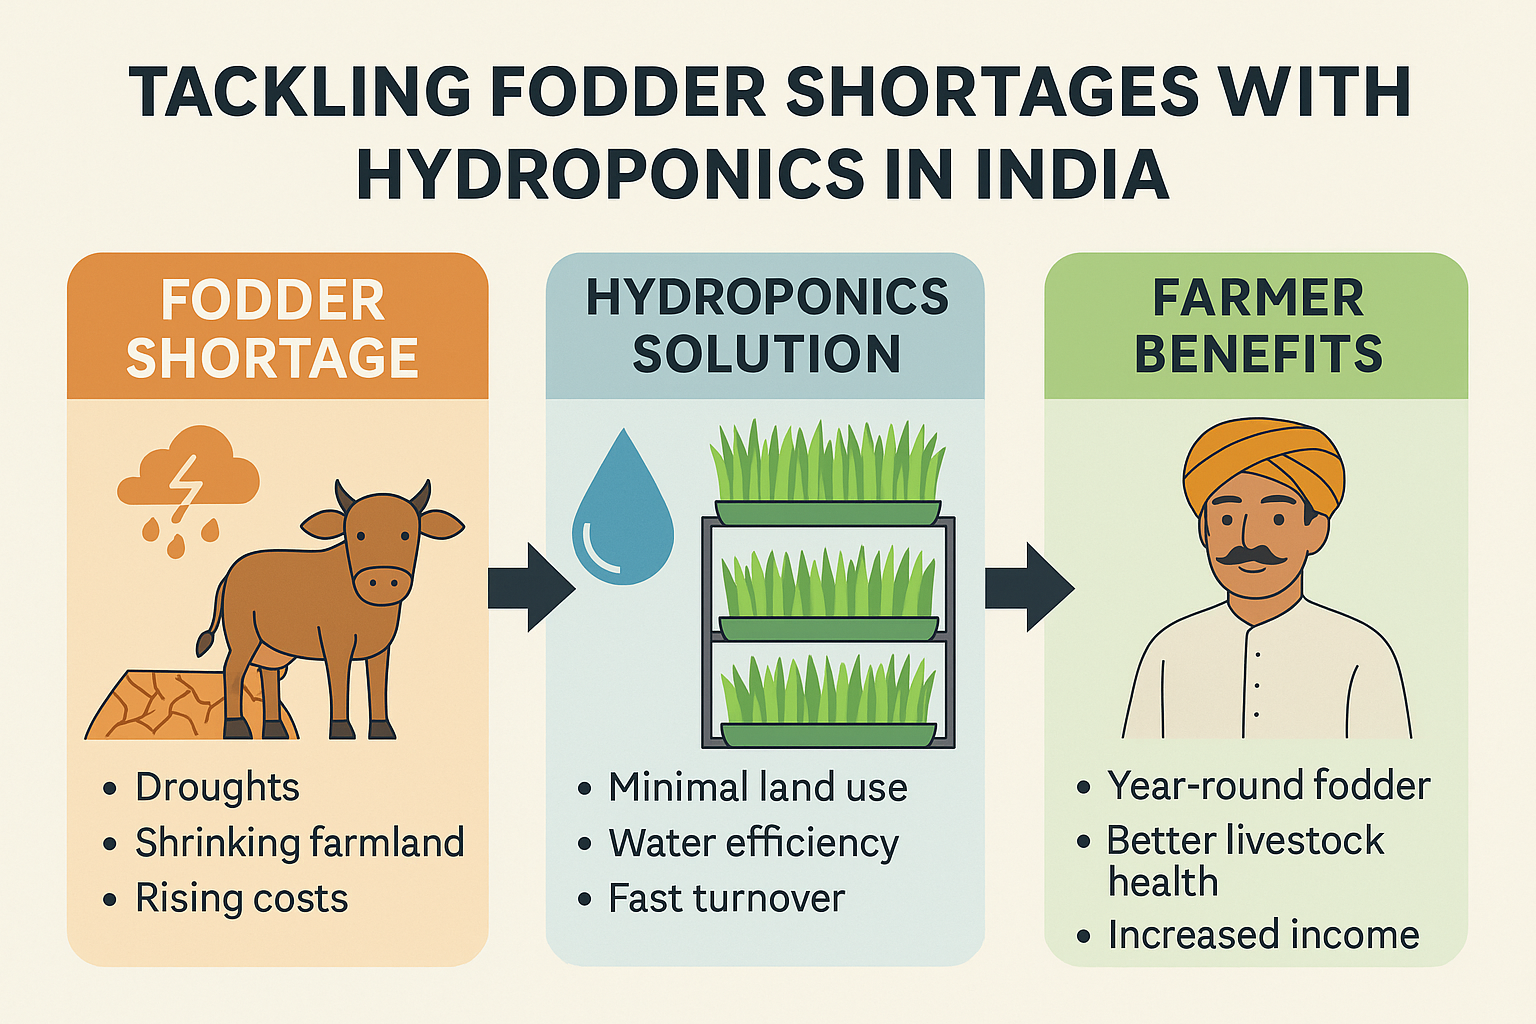
Hydroponic fodder farming is revolutionizing the way farmers and dairy owners produce fresh, nutrient-rich feed for livestock. By growing fodder without soil, you save water, reduce space requirements, and get consistent results year-round. In this guide, we’ll walk you through each step to set up your own hydroponic fodder system — whether it’s for a small farm, dairy, or even a backyard setup.
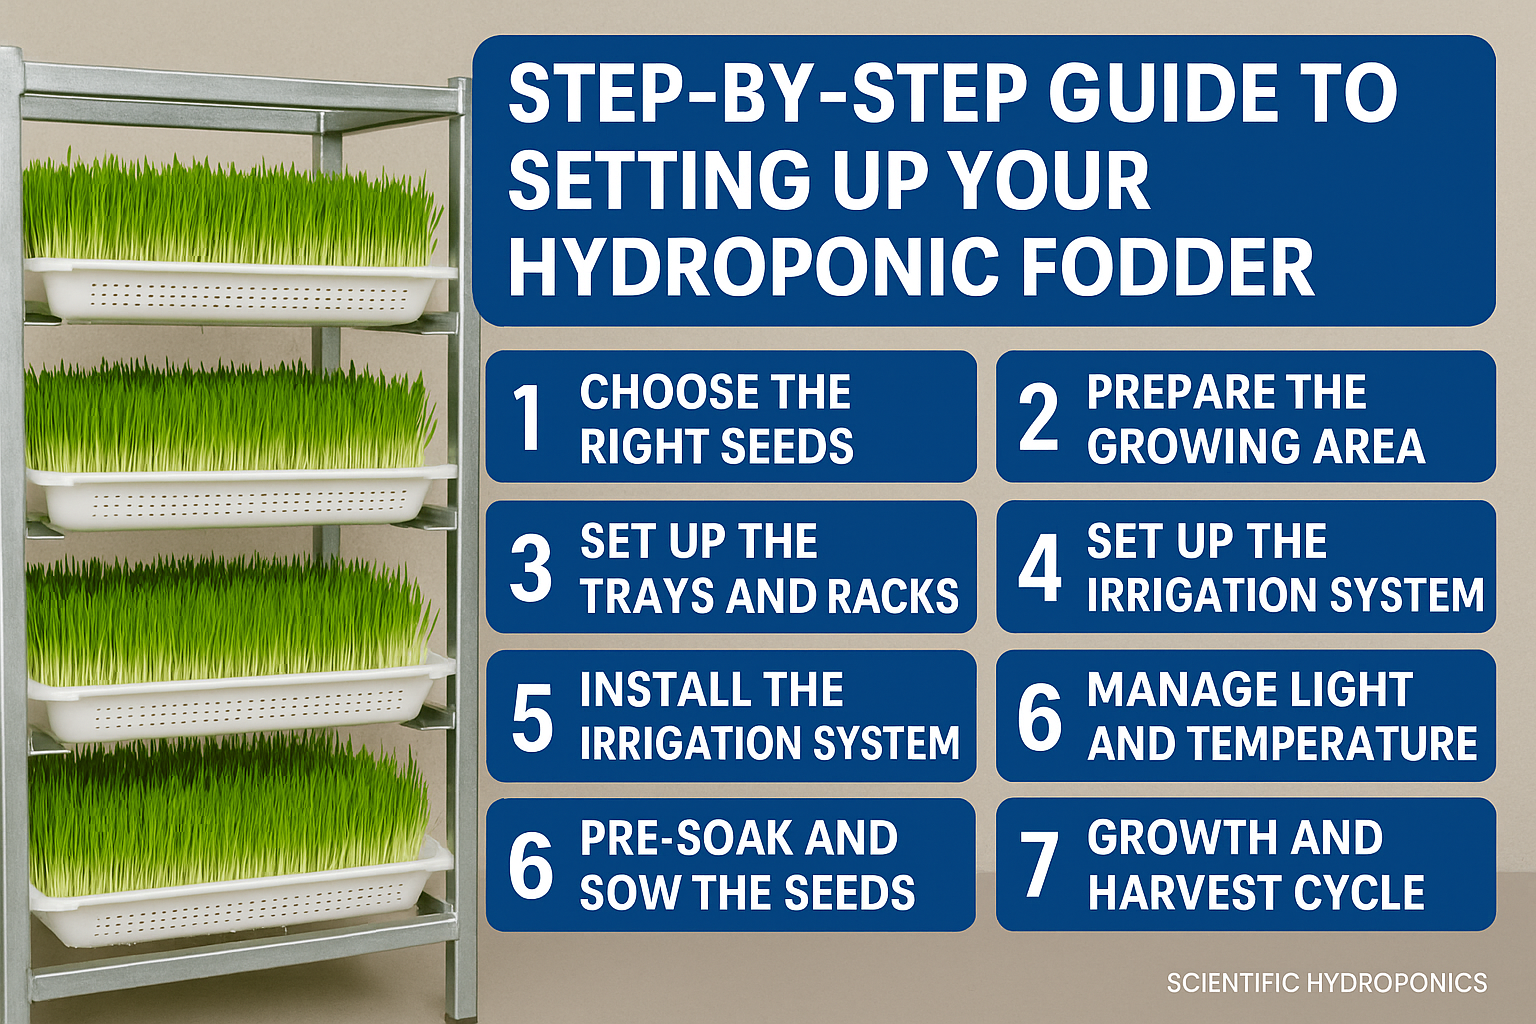
1. Choose the Right Seeds
The most popular crops for hydroponic fodder are barley, wheat, maize, oats, and sorghum.
- Select clean, high-quality seeds with a germination rate above 90%.
- Avoid chemically treated seeds — they can harm livestock.
- Buy from a trusted supplier to ensure consistent quality.
Tip: Barley is preferred for dairy cattle, while maize works well for goats and poultry.
2. Prepare the Growing Area
Your hydroponic fodder room or unit should have:
- Adequate ventilation to prevent mold.
- Temperature control: Ideal is 18–25°C.
- Humidity control: 60–70% for healthy sprouting.
- Shelving space: Vertical racks with trays save space.
If you’re in a hot region, insulated panels or a container-based setup work best.
3. Set Up the Trays and Racks
- Use food-grade plastic trays with small drainage holes.
- Arrange them on racks so that water flows down to lower trays.
- Make sure trays are easy to remove and clean daily.
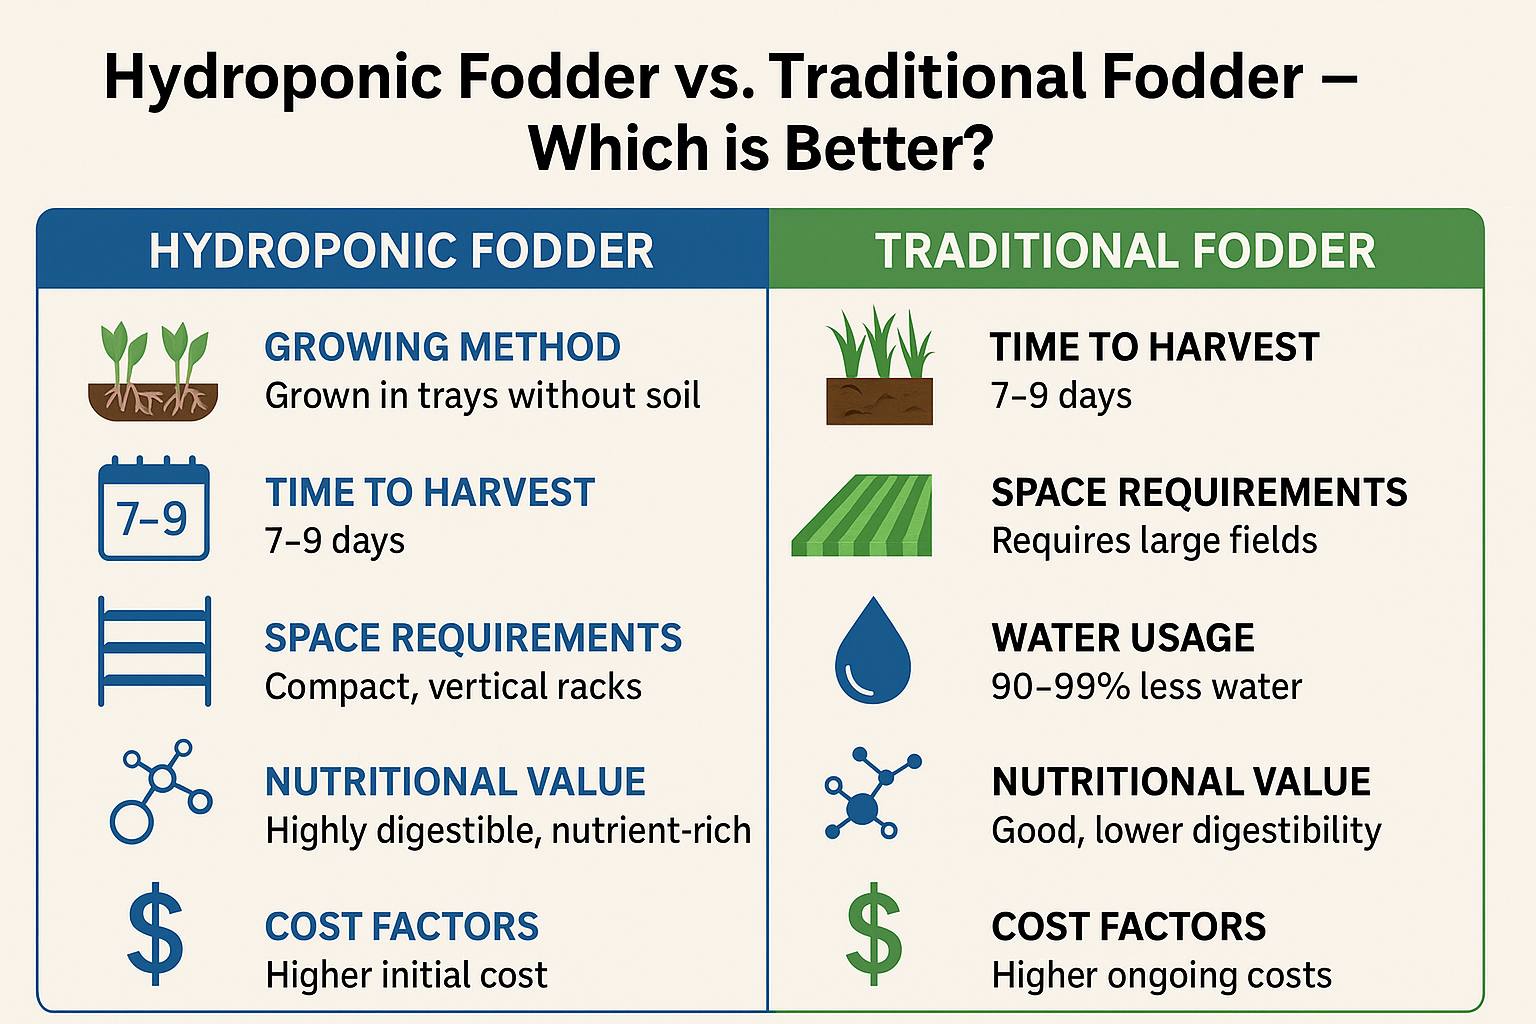
Size guide: A 1m x 0.5m tray can produce 6–8 kg of fresh fodder in 7 days.
4. Install the Irrigation System
Automated misting or drip systems work best to keep seeds moist.
- Use clean, filtered water to avoid contamination.
- Water lightly but frequently (3–5 times per day) — overwatering can cause mold.
- A timer-based pump system reduces manual work.
5. Pre-Soak and Sow the Seeds
- Soak seeds for 6–8 hours in clean water to activate germination.
- Spread them evenly on trays — a 1–1.5 cm thick layer works best.
- Avoid overcrowding; it reduces airflow and increases disease risk.
6. Manage Light and Temperature
- Hydroponic fodder grows best in natural or white LED light.
- Avoid direct sunlight — it can overheat trays.
- Keep a consistent temperature and check regularly.
7. Growth and Harvest Cycle
- Day 1–2: Seeds sprout.
- Day 3–5: Green shoots appear; water and check daily.
- Day 6–7: Fodder mat is ready — cut or feed directly.
A fresh tray should be sown daily so you have a continuous supply.
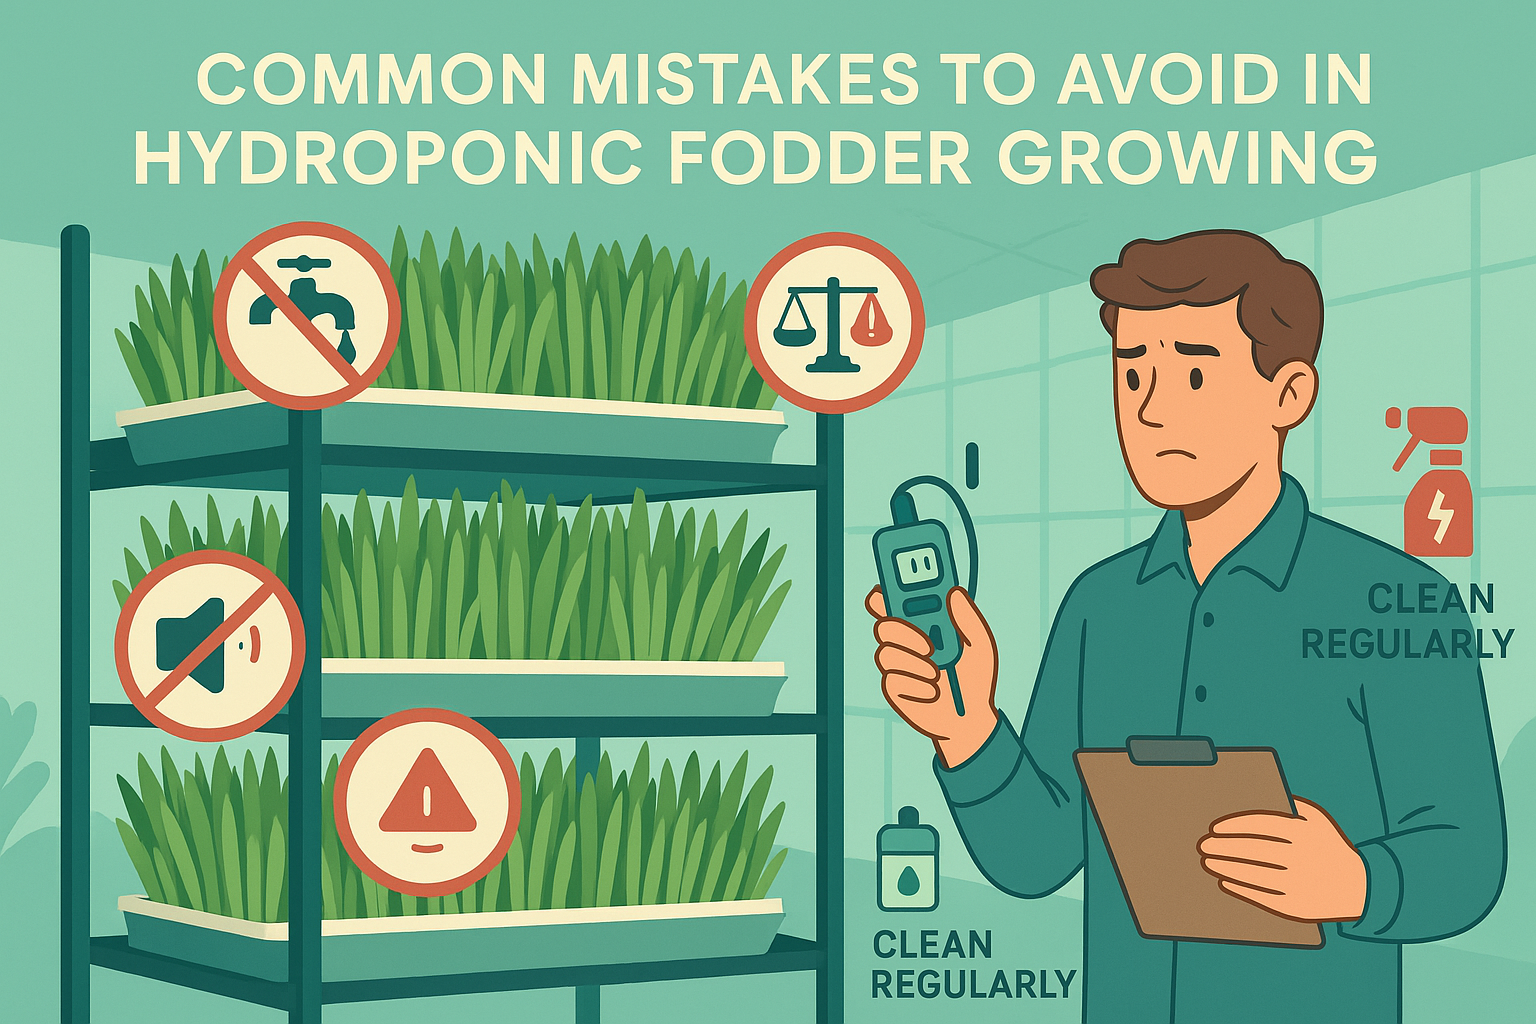
8. Cleaning and Maintenance
- Wash trays thoroughly after each cycle with mild disinfectant.
- Check irrigation lines for blockages.
- Keep the room clean and dry to prevent pests or mold.
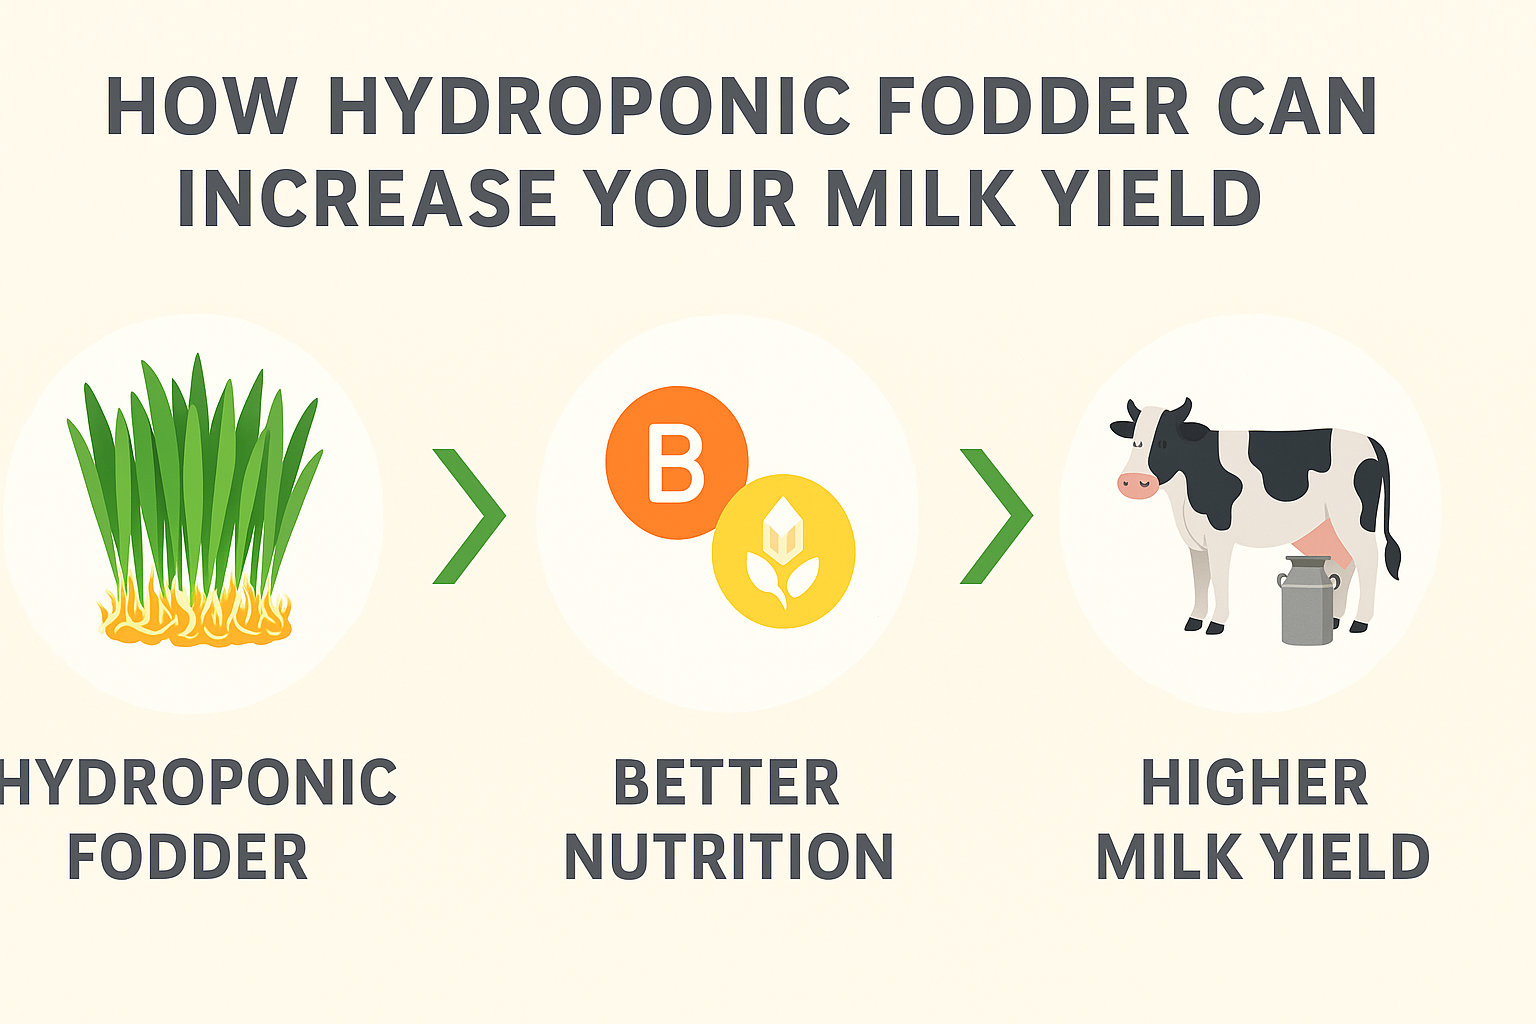
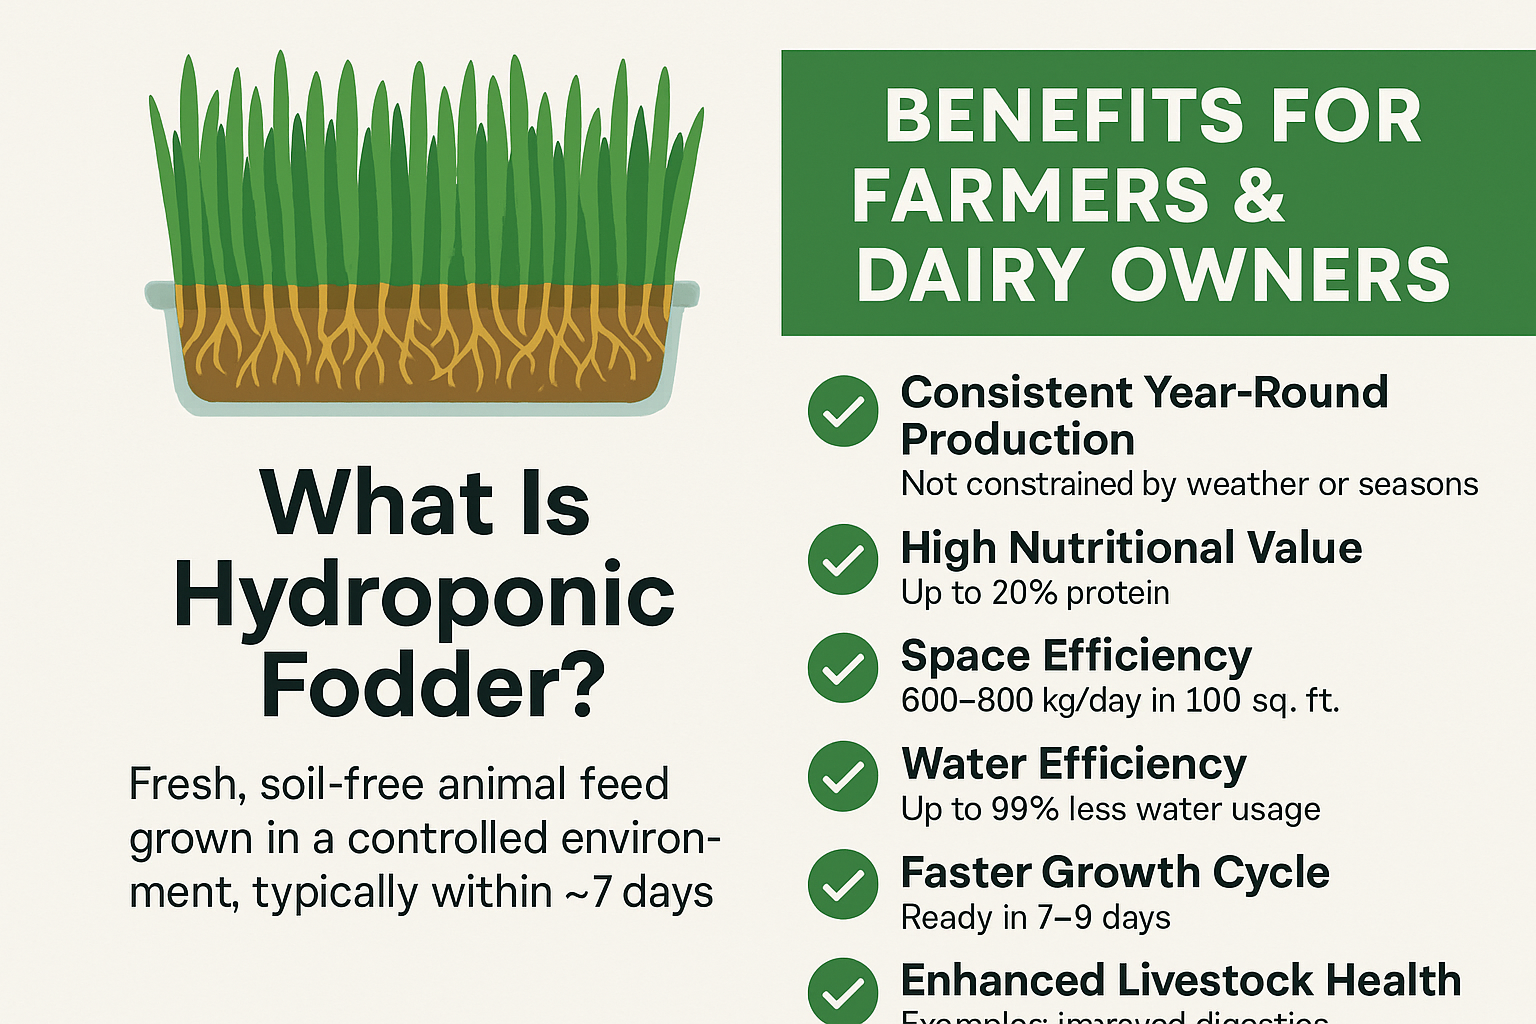
Benefits You’ll See
- Higher milk yield and improved animal health.
- Water savings of up to 90–95% compared to soil farming.
- Year-round production, even in drought or extreme weather.
Final Words:
Setting up a hydroponic fodder system is an investment that pays off in better livestock performance, reduced feed costs, and sustainable farming practices. Start small, learn the process, and scale up — within a few weeks, you’ll see the difference in your animals and your bottom line.

Leave a Reply